Kiribath Recipe: How to Make Sri Lanka’s Creamy Coconut Rice
If you’ve ever wondered what makes Sri Lankan cuisine so special, look no further than Kiribath. This creamy, coconut-infused rice dish is a staple in Sri Lankan households and a true celebration of simplicity and flavor. Whether it’s served at breakfast, during festivals like Sinhala and Tamil New Year, or as a comforting everyday meal, Kiribath has a way of bringing people together. Ready to make this iconic dish? Let’s dive in!
Why Kiribath is More Than Just Rice
Let’s be honest—rice is a global superstar, but Kiribath takes it to the next level. Made with just three ingredients (rice, coconut milk, and a pinch of salt), it’s proof that great food doesn’t need to be complicated. The secret? Coconut milk. It transforms plain rice into something rich, creamy, and utterly irresistible.
Fun fact: Kiribath is often called “milk rice” because of its silky texture. It’s not just food—it’s a symbol of prosperity and new beginnings in Sri Lankan culture. So yeah, it’s kind of a big deal.
The Secret to Perfect Kiribath
Before we jump into the recipe, let’s talk about what makes Kiribath stand out:
- Coconut Milk: Use fresh coconut milk if you can find it. If not, canned coconut milk works too—just make sure it’s full-fat for that creamy texture.
- Rice: Traditional recipes call for short-grain rice, but basmati or jasmine rice can also work if that’s what you have on hand.
- Cooking Technique: The key is to simmer the rice gently with coconut milk until it’s tender and slightly sticky. Overcooking = mushy rice. Undercooking = crunchy disappointment. Find the sweet spot.
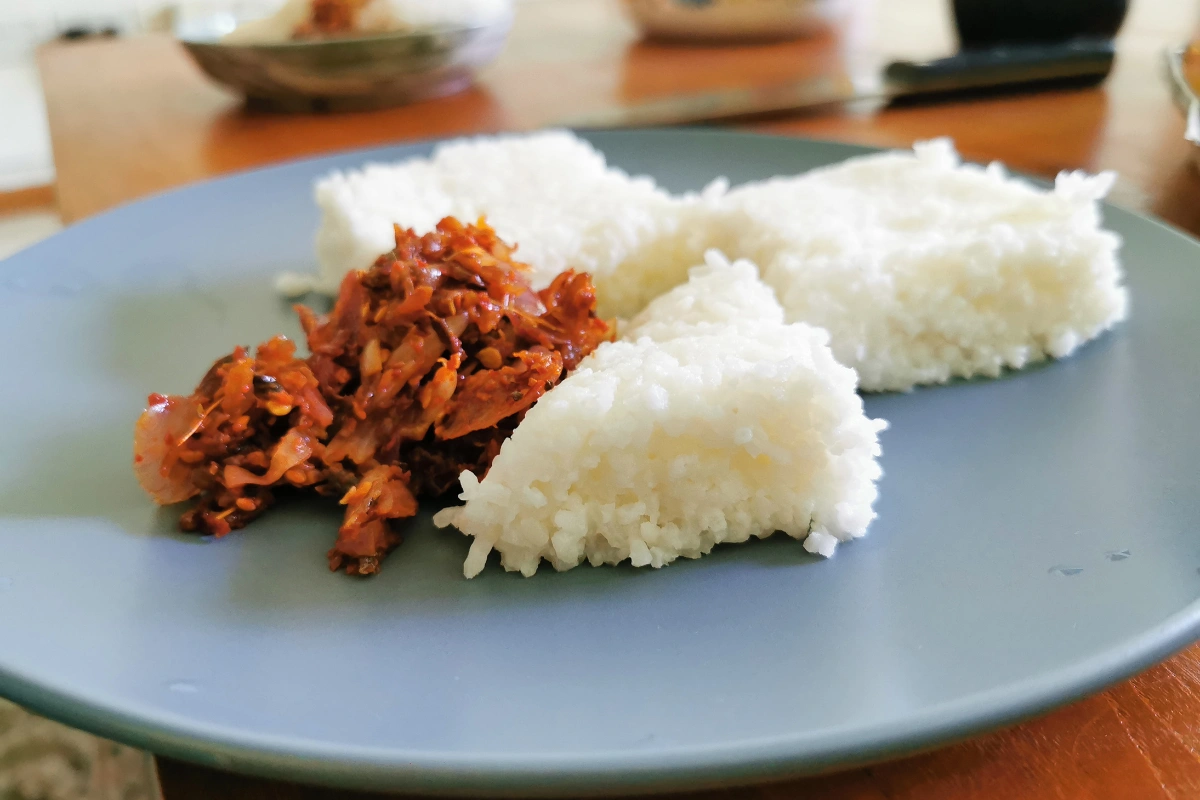
Pro tip: Serve Kiribath with lunu miris (a spicy onion and chili sambal) or curry for a flavor-packed combo. Trust me, you won’t regret it.
Step-by-Step Guide to Making Kiribath
Alright, let’s get cooking. Here’s how to make authentic Kiribath that’ll transport you straight to Sri Lanka.
Ingredients You’ll Need
- 1 cup short-grain rice (or basmati/jasmine rice)
- 1 cup coconut milk (fresh or canned)
- 1 cup water
- Pinch of salt
Let’s Get Cooking
1. Rinse the Rice
Start by rinsing the rice under cold water until the water runs clear. This removes excess starch and prevents the rice from becoming too sticky. Drain well.
2. Combine Ingredients
In a medium-sized pot, combine the rinsed rice, coconut milk, water, and a pinch of salt. Stir gently to mix everything together.
3. Cook the Rice
Place the pot over medium heat and bring the mixture to a gentle boil. Once it starts bubbling, reduce the heat to low, cover the pot, and let it simmer for about 15–20 minutes. Avoid stirring too much—just give it an occasional gentle stir to prevent sticking.
4. Check for Doneness
After 15 minutes, check the rice. It should be tender, creamy, and slightly sticky. If there’s still liquid in the pot, cook uncovered for a few more minutes until it evaporates.
5. Shape and Serve
Traditionally, Kiribath is pressed into a flat cake or cut into diamond-shaped pieces. To do this, lightly grease a plate or tray, spread the cooked rice evenly, and press it down with a spatula. Let it cool slightly before slicing. Serve warm or at room temperature.
Common Mistakes to Avoid
Let’s keep it real—Kiribath is simple, but there are a few things that can go wrong:
- Using Low-Quality Coconut Milk: Thin or watered-down coconut milk will leave your Kiribath lacking in creaminess. Stick to the good stuff.
- Overcooking the Rice: Keep an eye on it! Overcooked rice turns into a gluey mess, which nobody wants.
- Skipping the Resting Step: Letting the rice rest after cooking helps it firm up slightly, making it easier to shape.
Why Homemade Kiribath Always Wins
Sure, you could grab takeout or rely on instant rice, but nothing beats the aroma of coconut milk simmering with rice in your own kitchen. Plus, making Kiribath gives you a chance to connect with Sri Lankan traditions and flavors.
Here’s a little story: My first attempt at Kiribath was… interesting. I used light coconut milk because I thought it’d be “healthier.” Spoiler alert: it wasn’t. Lesson learned—always go for full-fat coconut milk. 😅
Final Thoughts: Time to Get Cooking
So there you have it—the ultimate guide to making Kiribath. Simple, creamy, and bursting with flavor, this dish is perfect for breakfast, brunch, or even as a side for curries.
Before you go, here’s a little nudge: What’s stopping you from trying this today? Grab some rice, coconut milk, and a pinch of curiosity, and let’s make some magic happen.
And hey—if you nail this recipe, drop me a comment or share your Kiribath pics. Or better yet, invite me over for a taste. 😉 Buon appetito—or should I say, සුභ ආහාරයක්!


