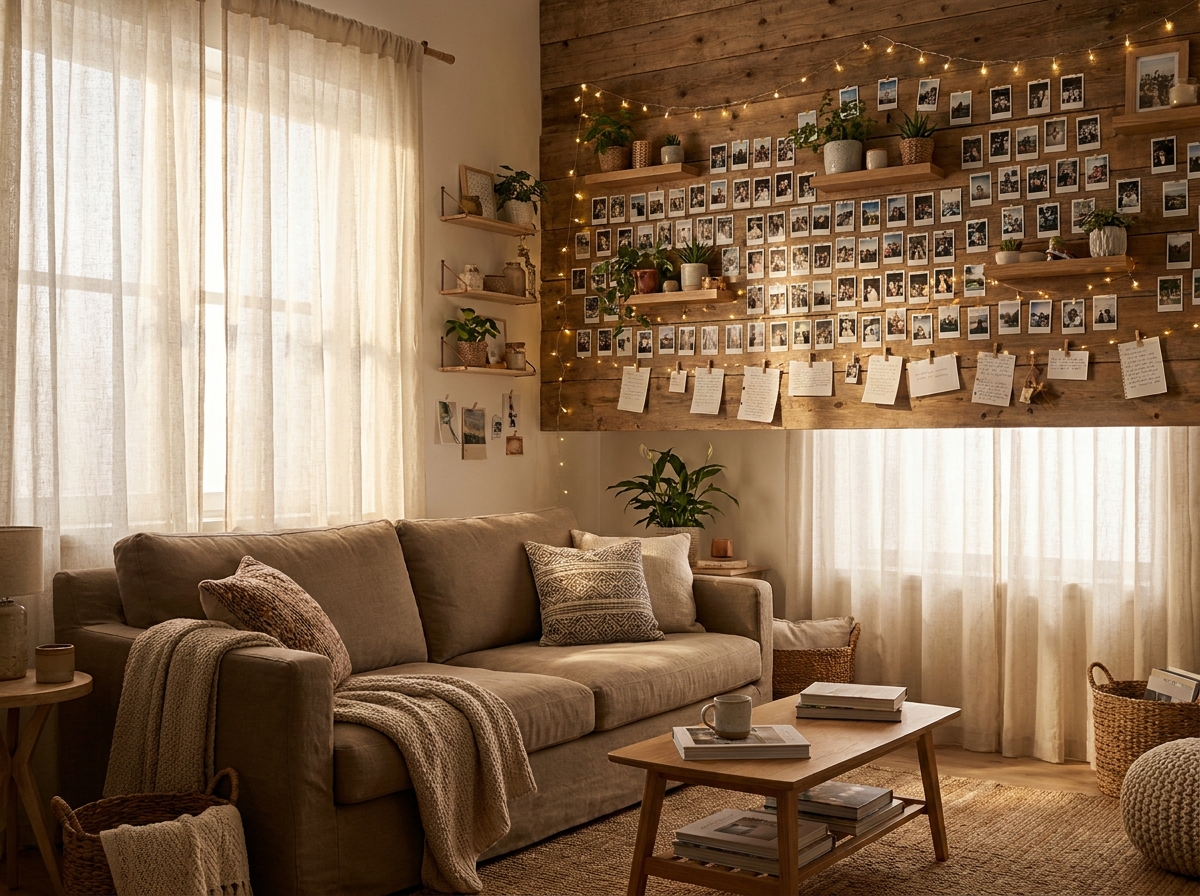
We all have hundreds of photos trapped inside our smartphones, but your favorite memories deserve to be experienced, not just stored in the cloud. A standard gallery wall is beautiful, but an interactive memory wall brings your space to life. It becomes a living, breathing part of your home—a place where you, your family, and your guests can add notes, swap out photos, and physically engage with the moments that matter most.
Whether you’re looking for a weekend DIY project or a complete room transformation, these 15 interactive memory wall design ideas will help you build a display that grows and changes right alongside you. Let’s dive into these stunning, highly customizable concepts that will make your walls talk!
Idea 01: The Polaroid String and Clip Display
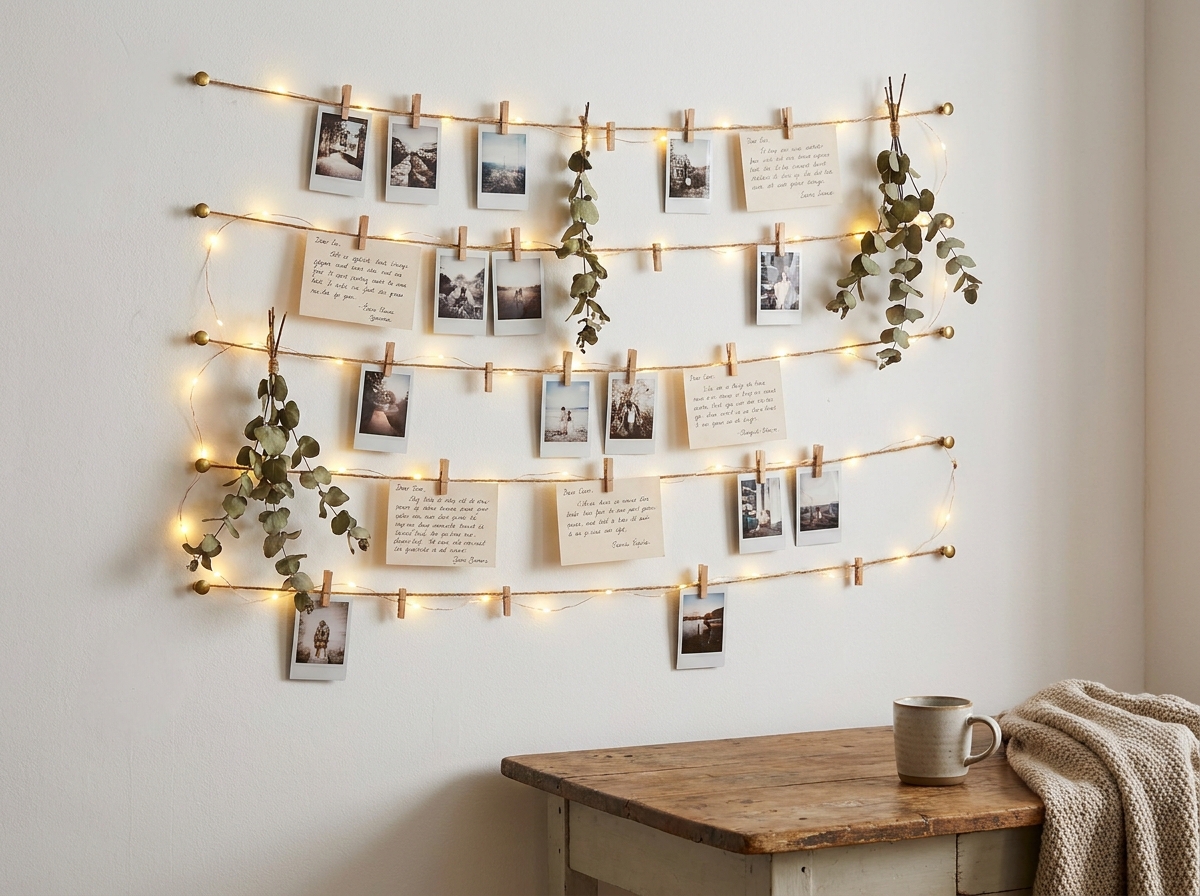
The polaroid string and clip display is an absolute classic, but its beauty lies in its effortless flexibility. By using rustic twine, fairy lights, or even sleek metallic wire, you create a baseline structure that allows for constant evolution. The magic of this design is that you are never locked into a specific layout or frame size. You can effortlessly unclip a summer vacation photo to make room for cozy winter holiday snapshots, making it incredibly responsive to seasonal trends.
To maximize the interactivity, keep a small, aesthetic box of blank cards, a fine-tip marker, and a vintage Polaroid camera on a table nearby. Encourage your guests to snap a photo, write a small note on the back, and clip it to the wall themselves. Mixing different textures—like adding dried pressed flowers, old concert tickets, and postcards among the photos—gives the wall that highly sought-after “whisk and flow” layered aesthetic. It’s budget-friendly, incredibly simple to install, and leaves zero major damage on your walls, making it perfect for renters.
Idea 02: Chalkboard Paint Background Canvas
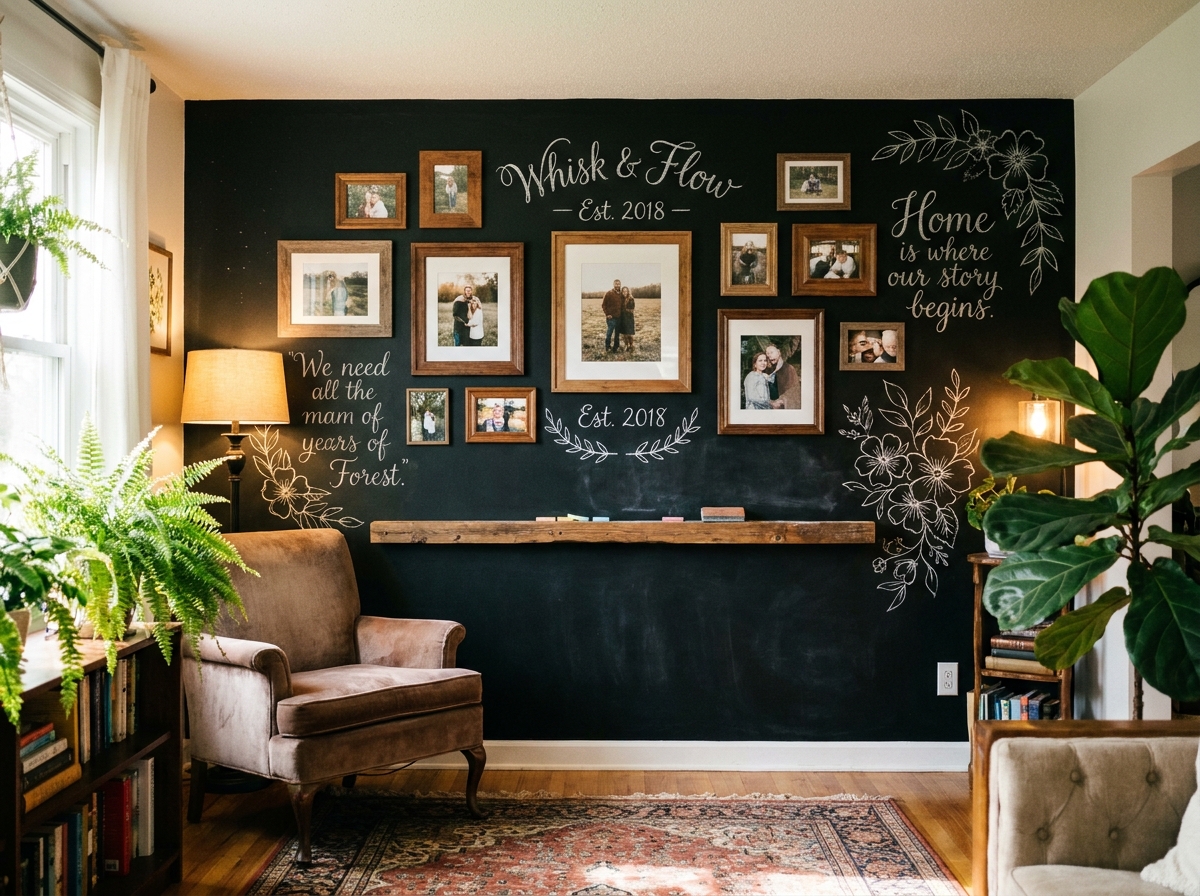
Taking interactivity to the next level, using a chalkboard paint background turns your entire wall into a customizable canvas. Instead of just hanging pictures, you can literally draw the context around them. Paint a specific accent wall, or even just a large rectangular section, with high-quality matte chalkboard paint. Once it cures, you can hang your photos, polaroids, or lightweight frames using double-sided mounting tape or magnetic strips.
The interactive element here is endless. You can use chalk or vibrant liquid chalk markers to write down the dates of the photos, draw ornate frames around unframed pictures, or leave inspiring daily quotes. If you have kids, this is a fantastic way to let them contribute to the family memory wall without ruining the paint job. When the seasons change, simply wipe the board clean and redesign the artwork around your photos. It adds a wonderfully dark, moody contrast to bright rooms and pairs beautifully with warm wood tones and lush green indoor plants.
Idea 03: The Push-Pin Travel Map
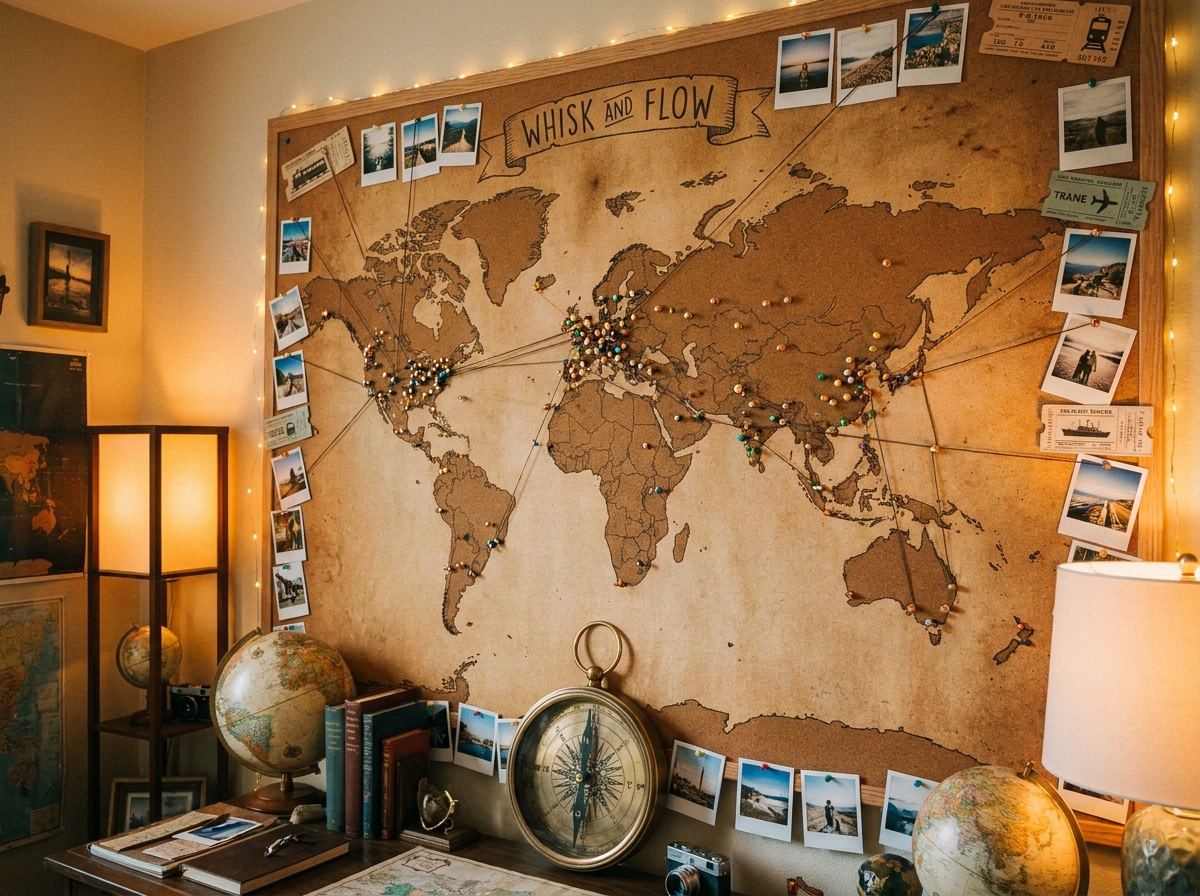
For the wanderlust enthusiast, a push-pin travel map is the ultimate interactive memory display. Instead of just showing where you’ve been, this design allows you to document the journey visually. Start by sourcing a large, high-quality canvas or corkboard printed with a beautifully detailed map—vintage sepia tones or sleek monochrome designs work best for a modern aesthetic.
Every time you take a trip, you get to experience the satisfying ritual of placing a new pin on the map. But don’t stop there. Take pieces of colored thread or twine and connect those geographic pins to the outer edges of the board, where you can pin small square photos, museum tickets, or train passes from that specific location. This transforms a standard map into a dynamic, storytelling web of your life’s adventures. It acts as an incredible conversation starter when guests come over, as they will naturally gravitate toward the board to trace your adventures and ask about the stories behind the strings.
Idea 04: Floating Ledges with Layered Frames
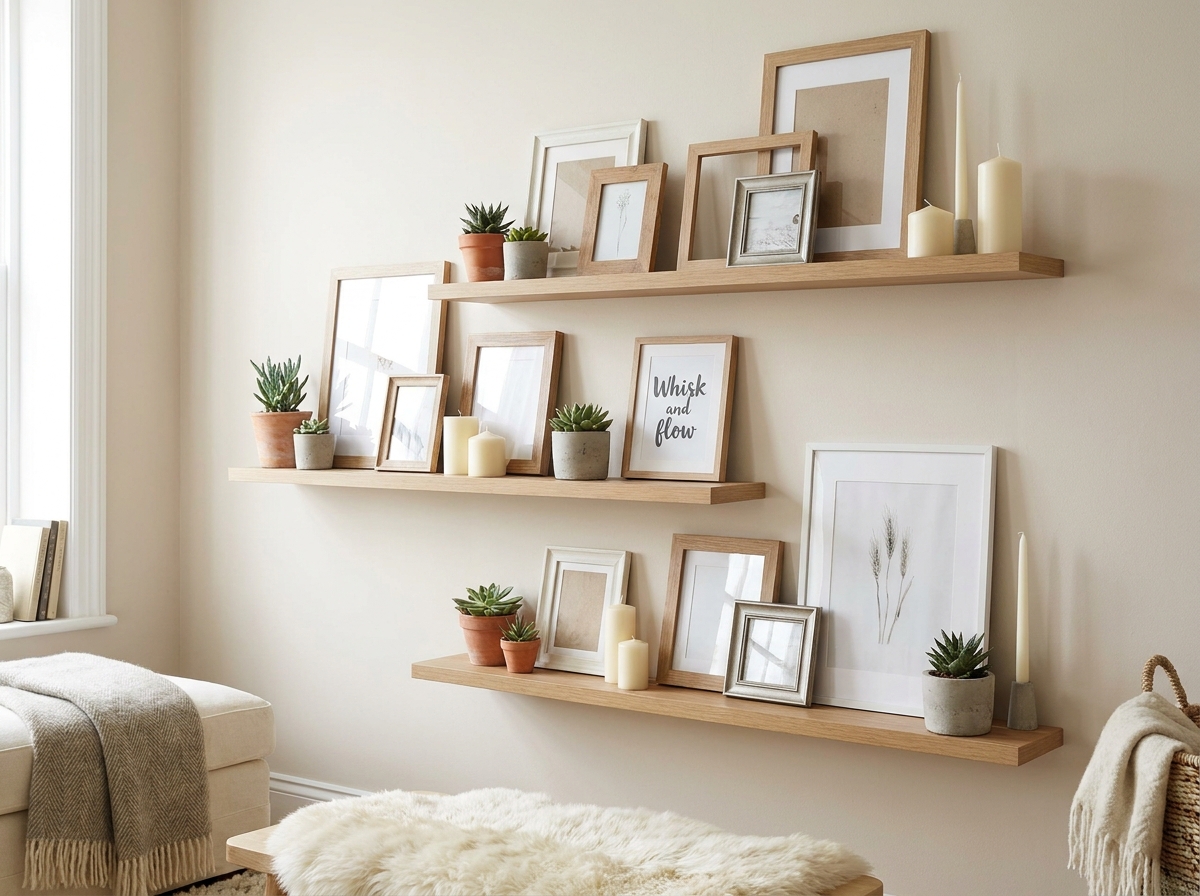
Gallery walls can be intimidating because they require precise measuring, hammering, and a commitment to a specific layout. Floating picture ledges solve this problem entirely while keeping the display highly interactive. By installing three to four staggered, shallow wooden shelves, you create a foundation where artwork and memories can be shuffled around at a moment’s notice.
The key to mastering this aesthetic is the art of layering. Instead of spacing frames evenly, intentionally overlap them. Place a large, minimalist black-and-white print in the back, and lean a smaller, colorful candid photo right in front of it. Because nothing is nailed to the wall, you can swap out photos every single season without picking up a single tool. Bring in autumn-themed art in October, and swap it for bright, airy family beach photos in July. To break up the squares, integrate small objects that hold memories, like a beautiful seashell from a vacation, a tiny succulent, or a special candle, giving the wall incredible depth and personality.
Idea 05: Scan-and-Listen QR Code Art
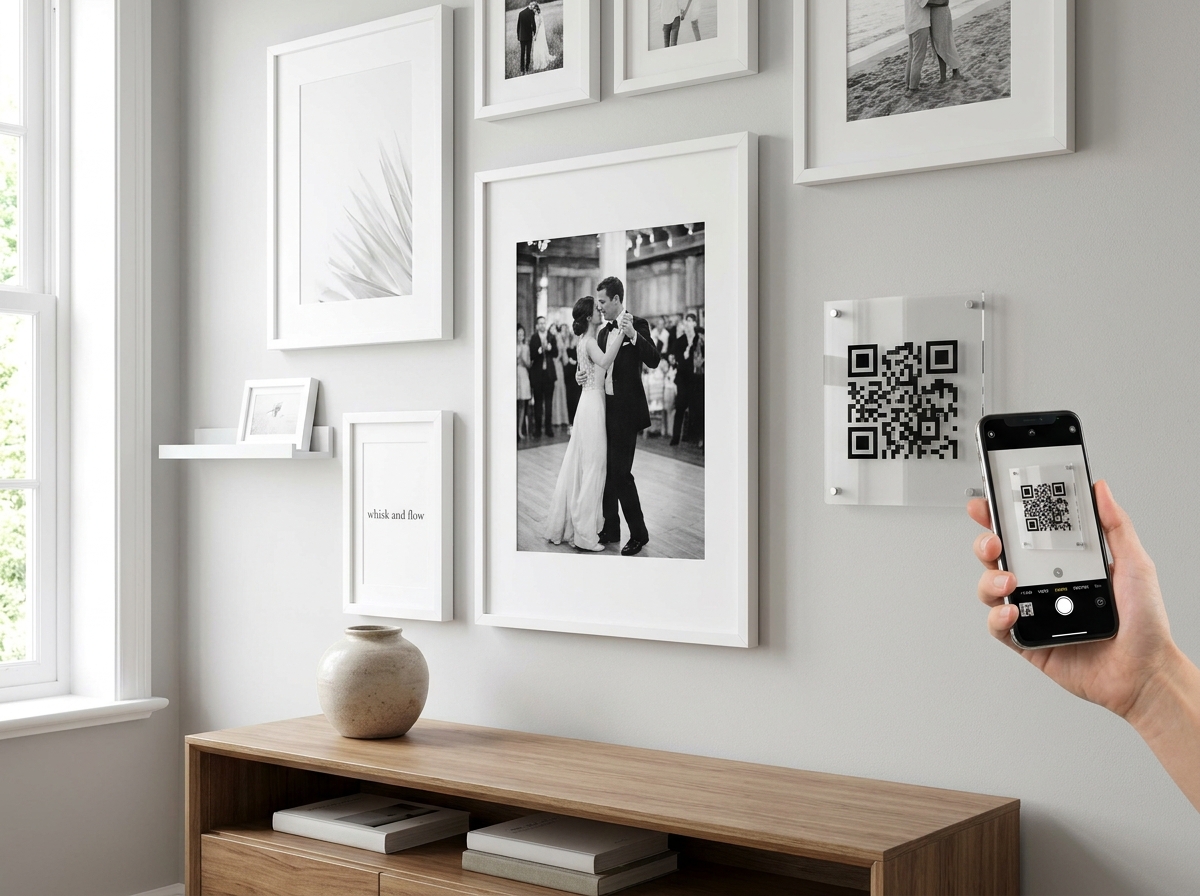
If you want a memory wall that bridges the physical and digital worlds, integrating QR codes is an incredibly unique and emotional idea. We capture so much video and audio on our phones—the sound of a loved one laughing, the speech from a wedding, or the ambient noise of a bustling foreign market—but photos alone can’t convey sound.
To create this, print out your favorite photographs and frame them beautifully. Then, use a free online QR code generator to link to a private YouTube video, an audio file in your Google Drive, or a Spotify playlist. Print the QR code onto a tiny, elegant card or an acrylic tile, and mount it right next to the corresponding photo. When guests walk by, they can point their smartphone camera at the wall and instantly watch the video or hear the audio that matches the picture. It creates a deeply immersive, museum-like experience in your own hallway, turning static images into vibrant, living memories.
Idea 06: “Take a Memory, Leave a Memory” Envelope Board
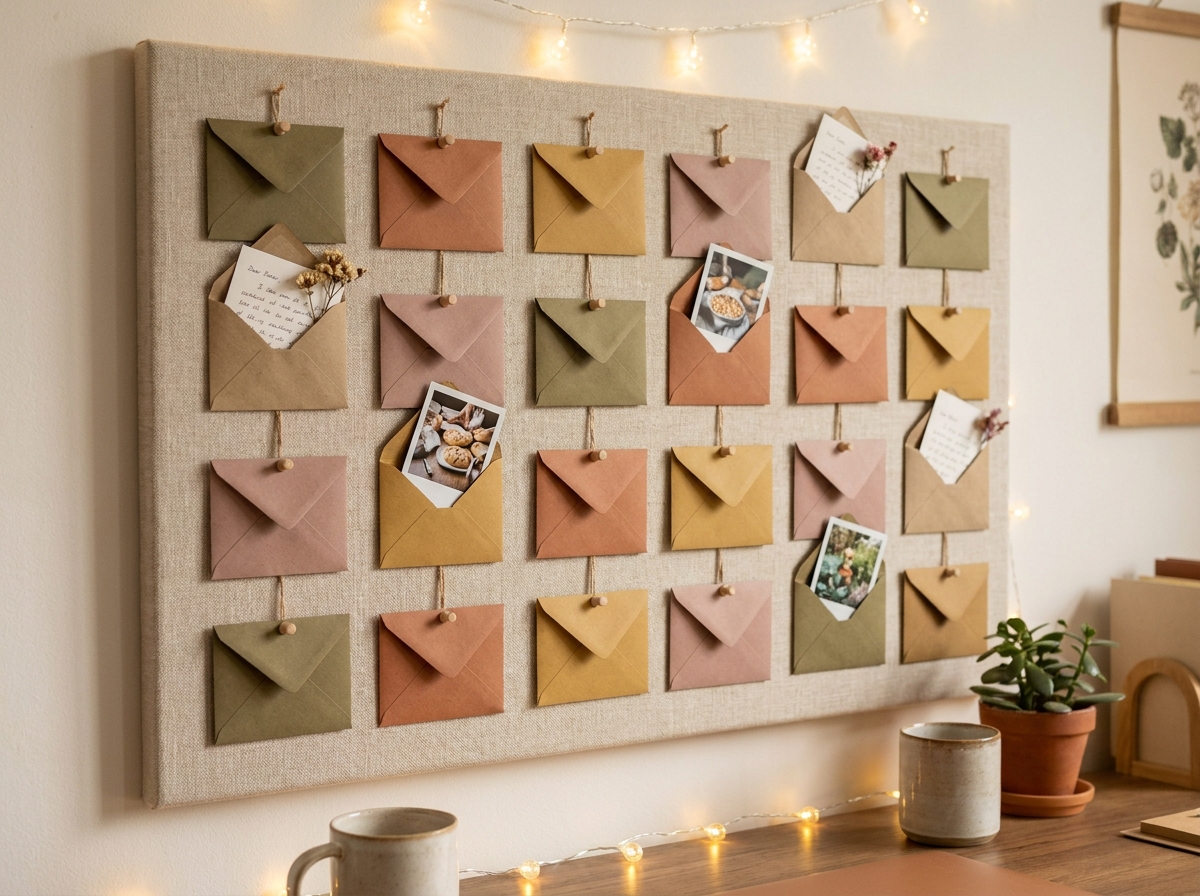
This design is incredibly heartwarming and acts as an ongoing, interactive game for your household or roommates. Start with a large, beautiful corkboard wrapped in a neutral linen fabric. Pin a grid of small, aesthetically pleasing envelopes across the board—kraft paper or pastel colors work beautifully.
The concept is simple: whenever you have a great day, inside joke, or tiny piece of memorabilia (like a fortune cookie slip or a movie ticket), you tuck it into one of the empty envelopes. You can invite your guests to write a secret message and seal it inside an envelope before they leave. On difficult days, or perhaps on New Year’s Eve, you and your family can open random envelopes to re-experience those hidden pockets of joy. It transforms the wall from a simple visual display into an emotional time capsule. The visual of the grid, slowly filling up with slightly bulging, mysterious envelopes, creates a deeply cozy and intriguing focal point for any room.
Idea 07: The Magnetic Accent Wall
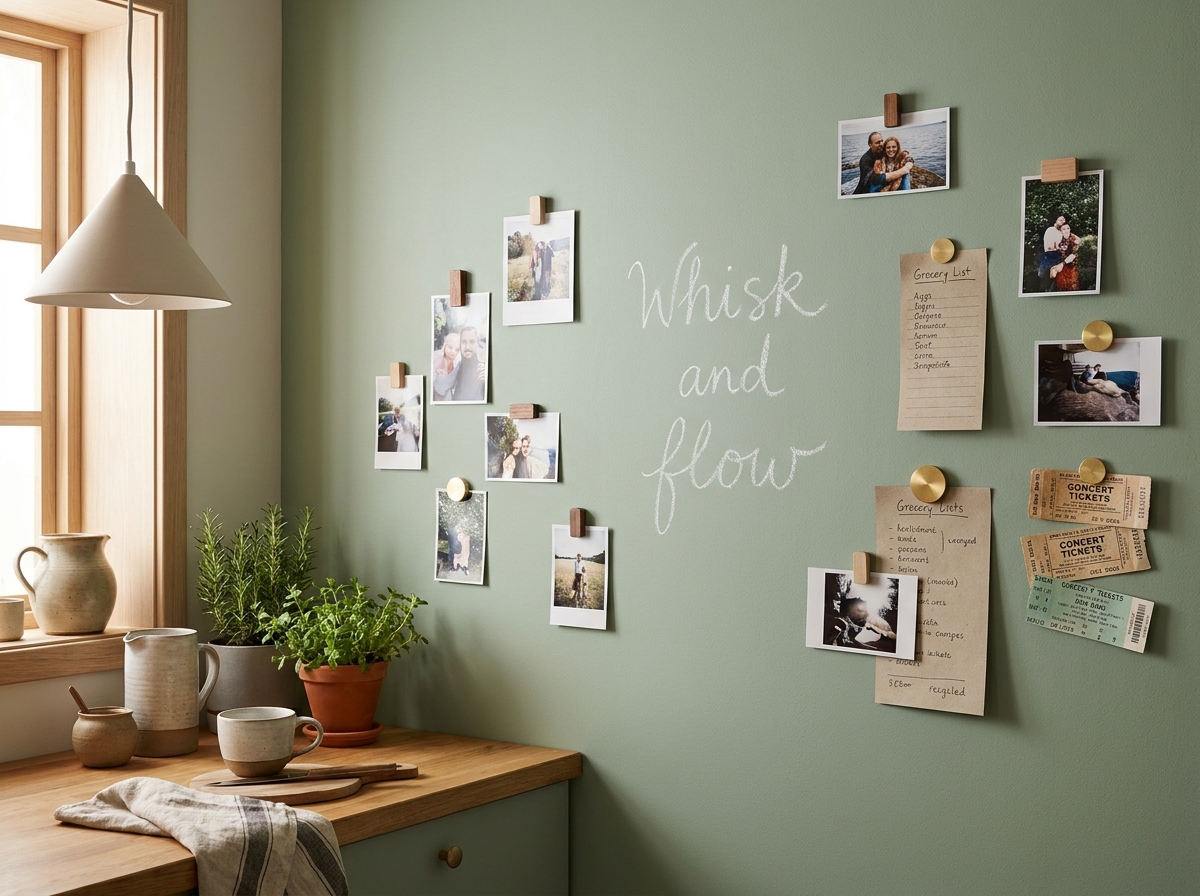
Did you know that you can buy magnetic wall primer at almost any hardware store? This brilliant DIY trick allows you to turn any flat surface in your home into an interactive, invisible bulletin board without the need for a metal panel. You simply apply a few coats of the dark magnetic primer, and then paint right over it with your regular, beautifully colored interior wall paint.
Once dry, the wall looks like any other standard wall in your house, but it holds a secret superpower. You can take strong neodymium magnets (look for aesthetic ones clad in wood or brushed brass) and stick your photos, invitations, and memories directly onto the drywall. It is the ultimate interactive setup because you can literally slide photos around, group them by color, or wipe the wall completely clean in seconds. It’s particularly effective in a kitchen, home office, or hallway where daily life happens, allowing you to seamlessly blend beautiful family memories with functional daily reminders.
Idea 08: Wire Grid Organizer Panels
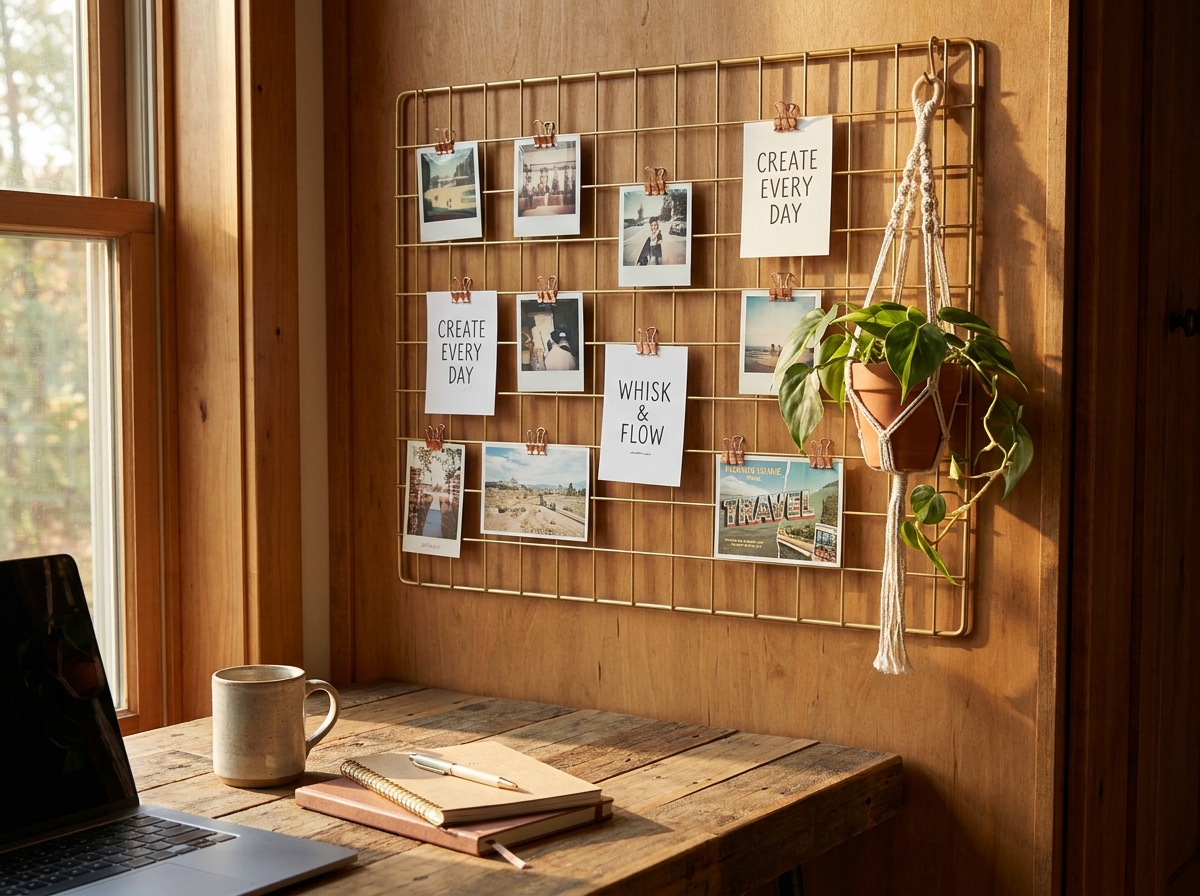
Wire grid panels have taken Pinterest by storm, and for good reason—they are the perfect blend of industrial chic and soft, cozy aesthetic when styled correctly. By mounting a large metal grid (black, white, or brass/gold tones work best) to your wall, you instantly create a highly versatile framework.
What makes the wire grid so special is its 3D capability. You aren’t just limited to flat photos. Using small binder clips, S-hooks, and mini clothespins, you can attach small wire baskets to hold memory-triggering physical items—like a seashell, a pair of vintage sunglasses, or a bundle of dried lavender from a special trip. You can weave fairy lights directly through the metal squares, and easily clip up instant photos or inspirational magazine cutouts. Because the grid itself is so rigid and structured, the chaotic, beautiful mess of memories you attach to it looks intentional and highly curated, keeping your space looking chic rather than cluttered.
Idea 09: Transparent Acrylic Dry-Erase Boards
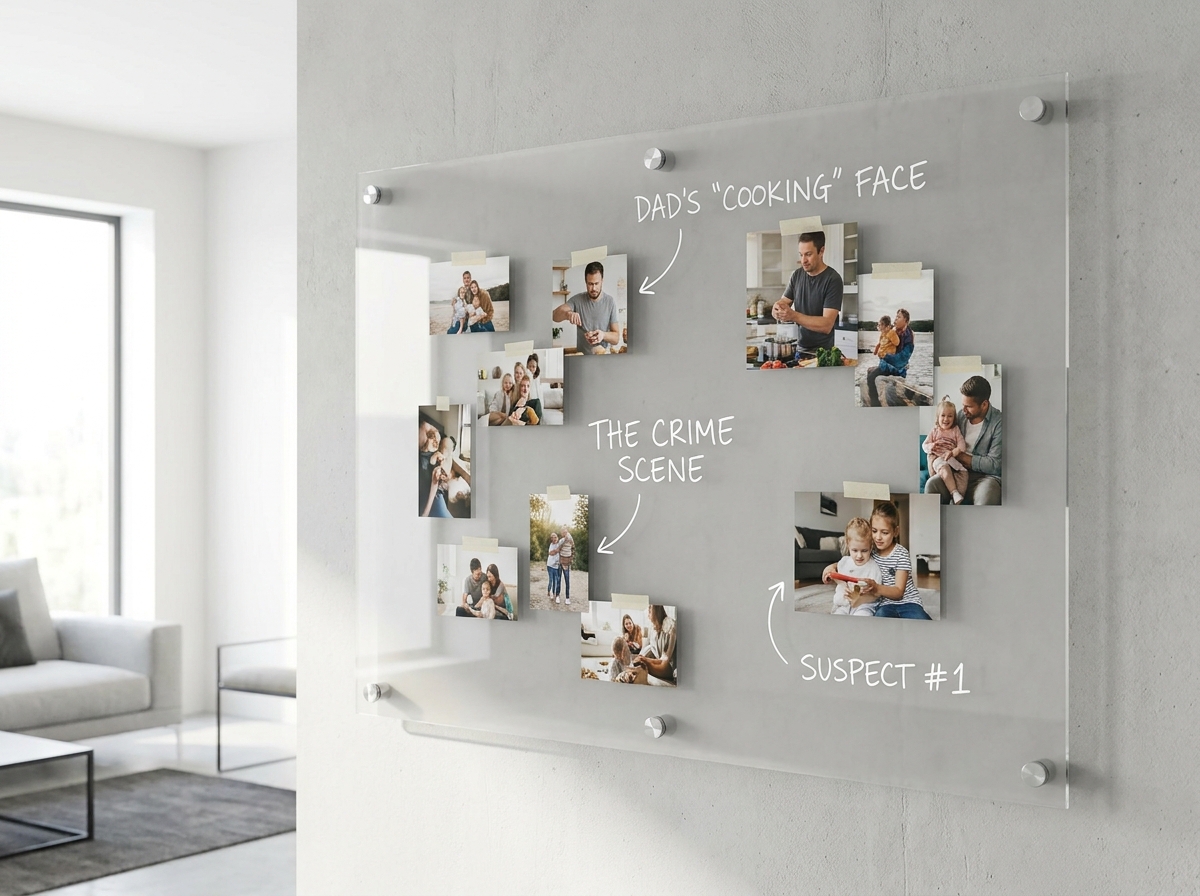
If your home leans more toward a modern, minimalist aesthetic, this interactive acrylic idea is a showstopper. You mount a large sheet of thick, clear acrylic to the wall using metal standoffs, which leaves a gap of about an inch between the wall and the plastic. You then stick your photos directly onto the drywall behind the acrylic.
The interactivity comes from the surface of the board itself. Because it is acrylic, you can use dry-erase markers to write directly over the floating photos. You can draw funny hats on your friends, write down the specific date the photo was taken, or leave little notes pointing to specific memories. When you want a cleaner look, just wipe the acrylic spotless, leaving only the beautifully protected photos floating behind the glass. It’s an incredibly sleek, museum-quality display that adds an element of cheeky fun, making it perfect for a modern dining room or a teenager’s bedroom.
Idea 10: The Interactive Family Tree Decal
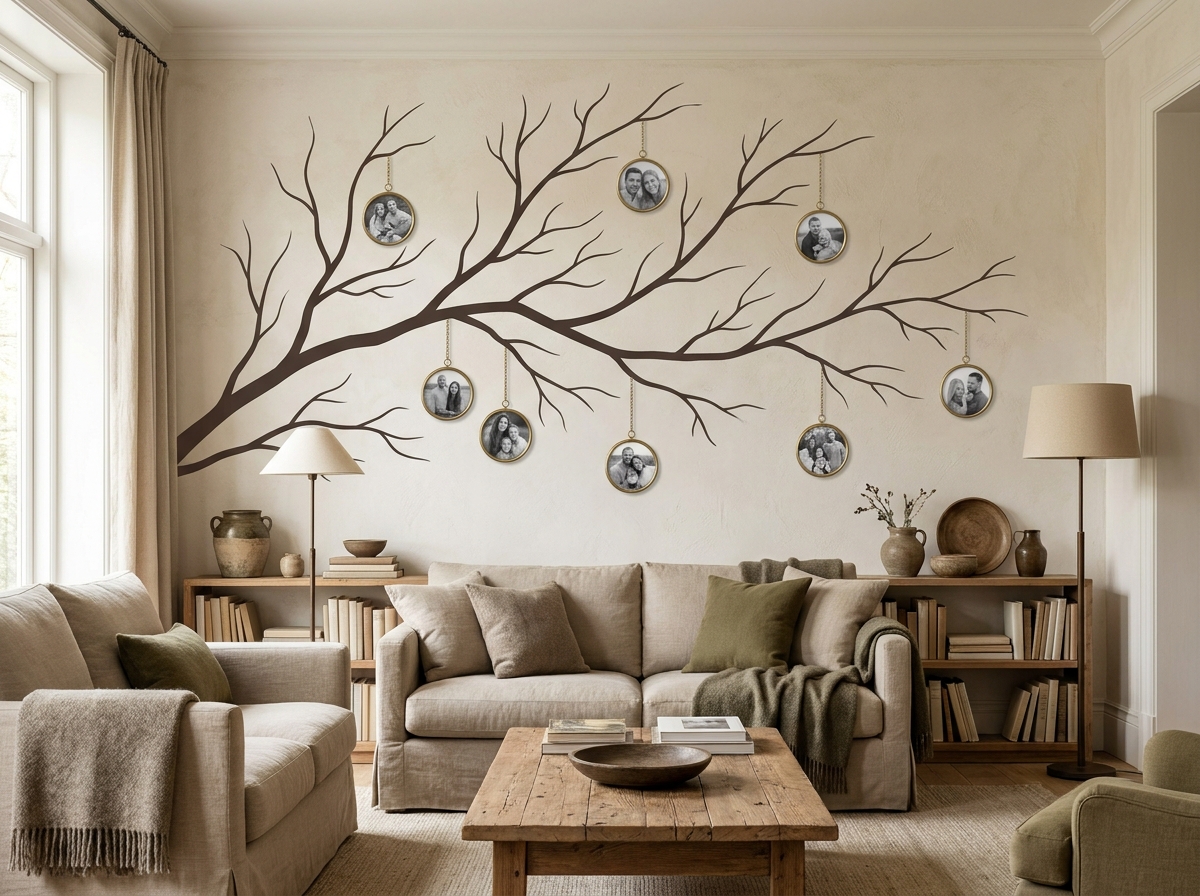
The family tree is a classic concept, but making it physically interactive brings a whole new layer of sentimentality to your home decor. Start with a large, high-quality vinyl wall decal of a beautiful, stylized tree—birch trees or minimalist silhouettes work wonderfully for a modern look. Alternatively, if you are artistic, you can hand-paint the branches directly onto the wall.
Instead of printing the photos onto the decal itself, use small, lightweight picture frames or wooden discs to represent the “leaves.” Attach these frames to the wall using command strips. As your family grows—through marriages, new babies, or even adopting new pets—you can physically add new photo frames to the expanding branches. It becomes a living document of your family’s history. When family members come to visit, looking at the tree becomes an interactive storytelling session, tracing lineages and sharing anecdotes about the relatives displayed on the branches.
Idea 11: Modular Pegboard Display
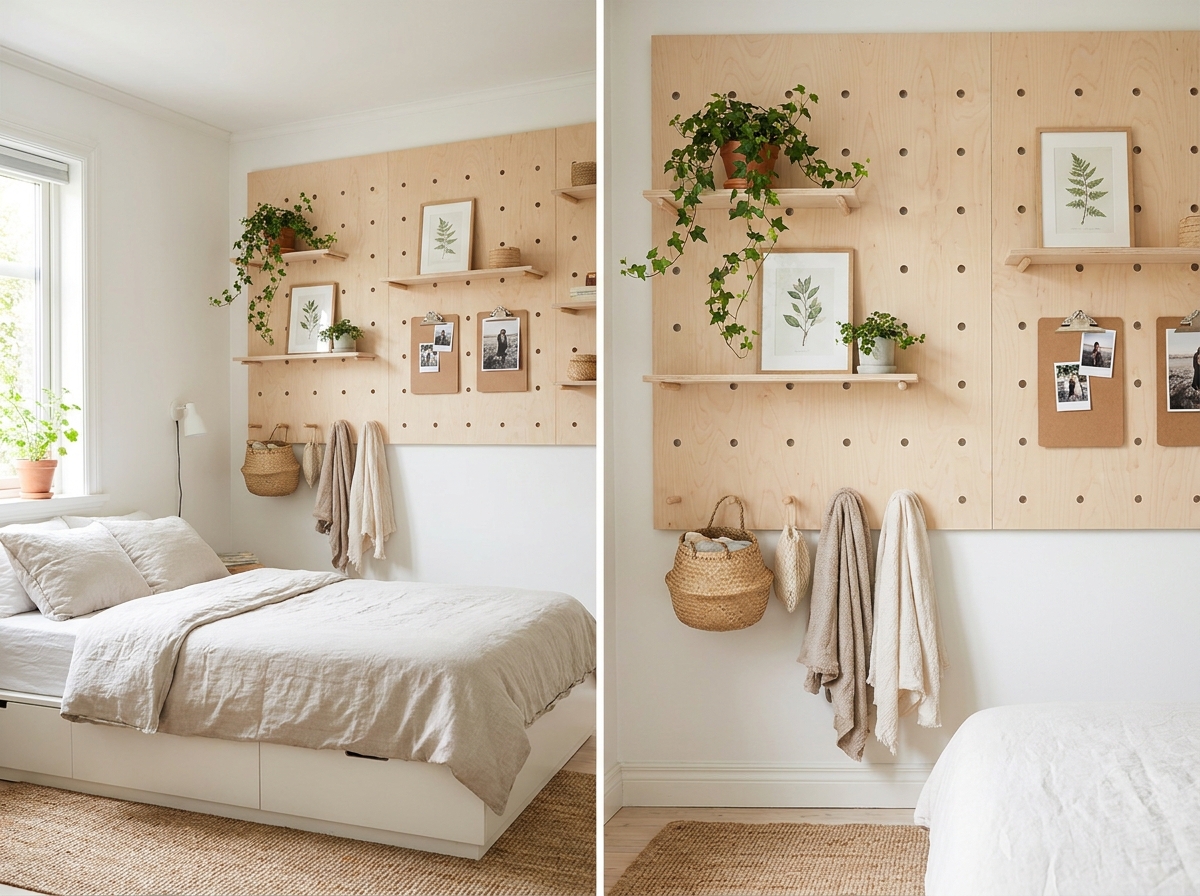
Traditionally found in garages or craft rooms, the pegboard has been elevated into high-end interior design, making it an incredibly robust interactive memory wall. By installing a custom, light-wood or brightly painted pegboard in your living room or study, you give yourself the ultimate modular playground.
The pegboard allows you to insert wooden dowels anywhere on the grid. You can rest small custom shelves on these dowels to hold framed photos, or simply hang clipboards directly from the pegs. The beauty of this system is that you can literally redesign the entire wall in ten minutes. One month, it can be entirely dedicated to photos from a recent wedding. The next month, you can rearrange the pegs to hold small memory boxes, a calendar, and trailing indoor plants alongside your pictures. It satisfies the urge to constantly redecorate your space without having to patch any drywall holes, making it highly functional and beautiful.
Idea 12: Ticket Stub & Keepsake Shadow Boxes
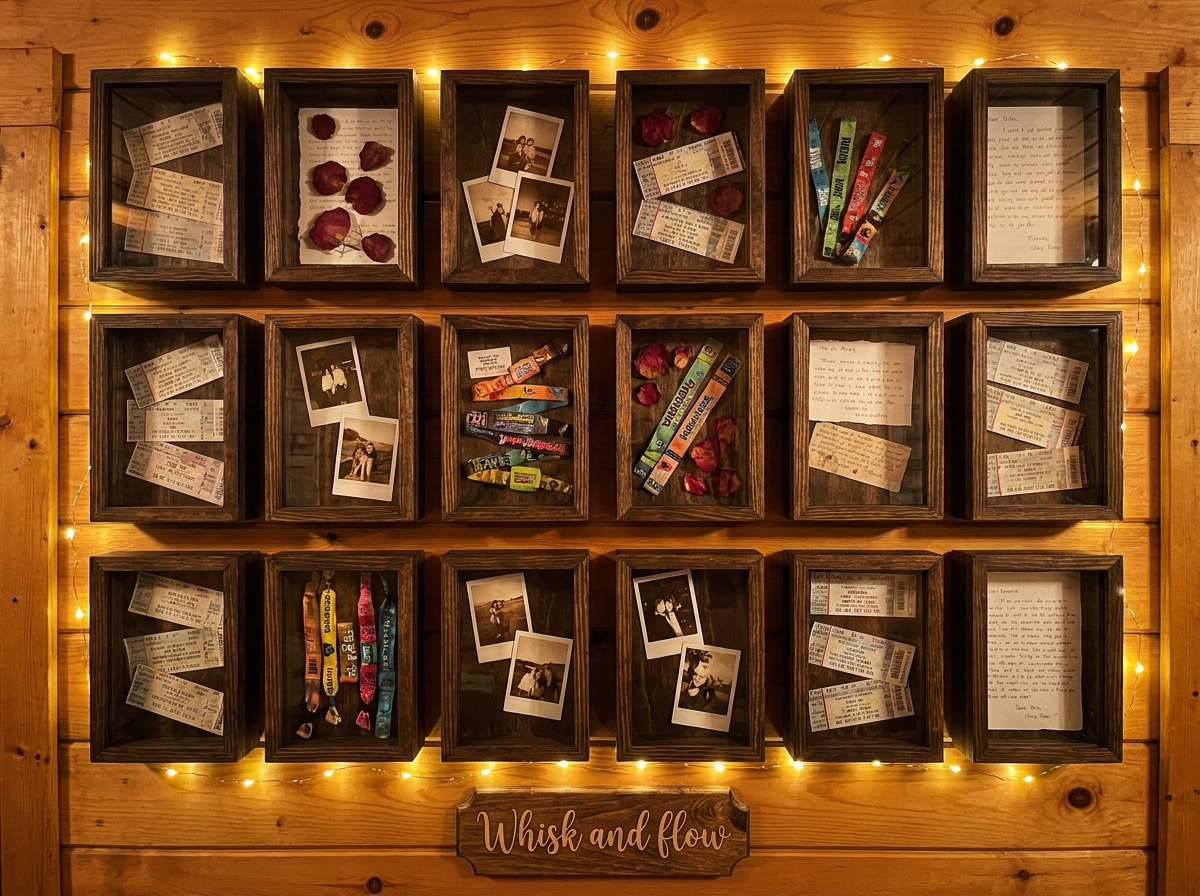
Memories aren’t just flat photographs; they are three-dimensional objects. Wristbands from music festivals, boarding passes, matchbooks from a favorite restaurant, and dried boutonnieres often end up lost in junk drawers. Creating a memory wall composed entirely of interactive shadow boxes solves this problem while creating stunning, textured art.
Purchase several top-loading shadow boxes—these are frames with a slot cut into the top, much like a piggy bank. Hang them on your wall, perhaps labeling them by year or by category (“Concerts,” “Travel,” “Date Nights”). As you go about your life, you simply drop your physical keepsakes into the slot at the top of the frame. Over time, the boxes fill up from the bottom, creating a beautiful, chaotic collage of your life’s best moments. You are actively building the artwork day by day, making it the most effortless yet deeply personal interactive display you can create.
Idea 13: Neon Sign and Photo Collage
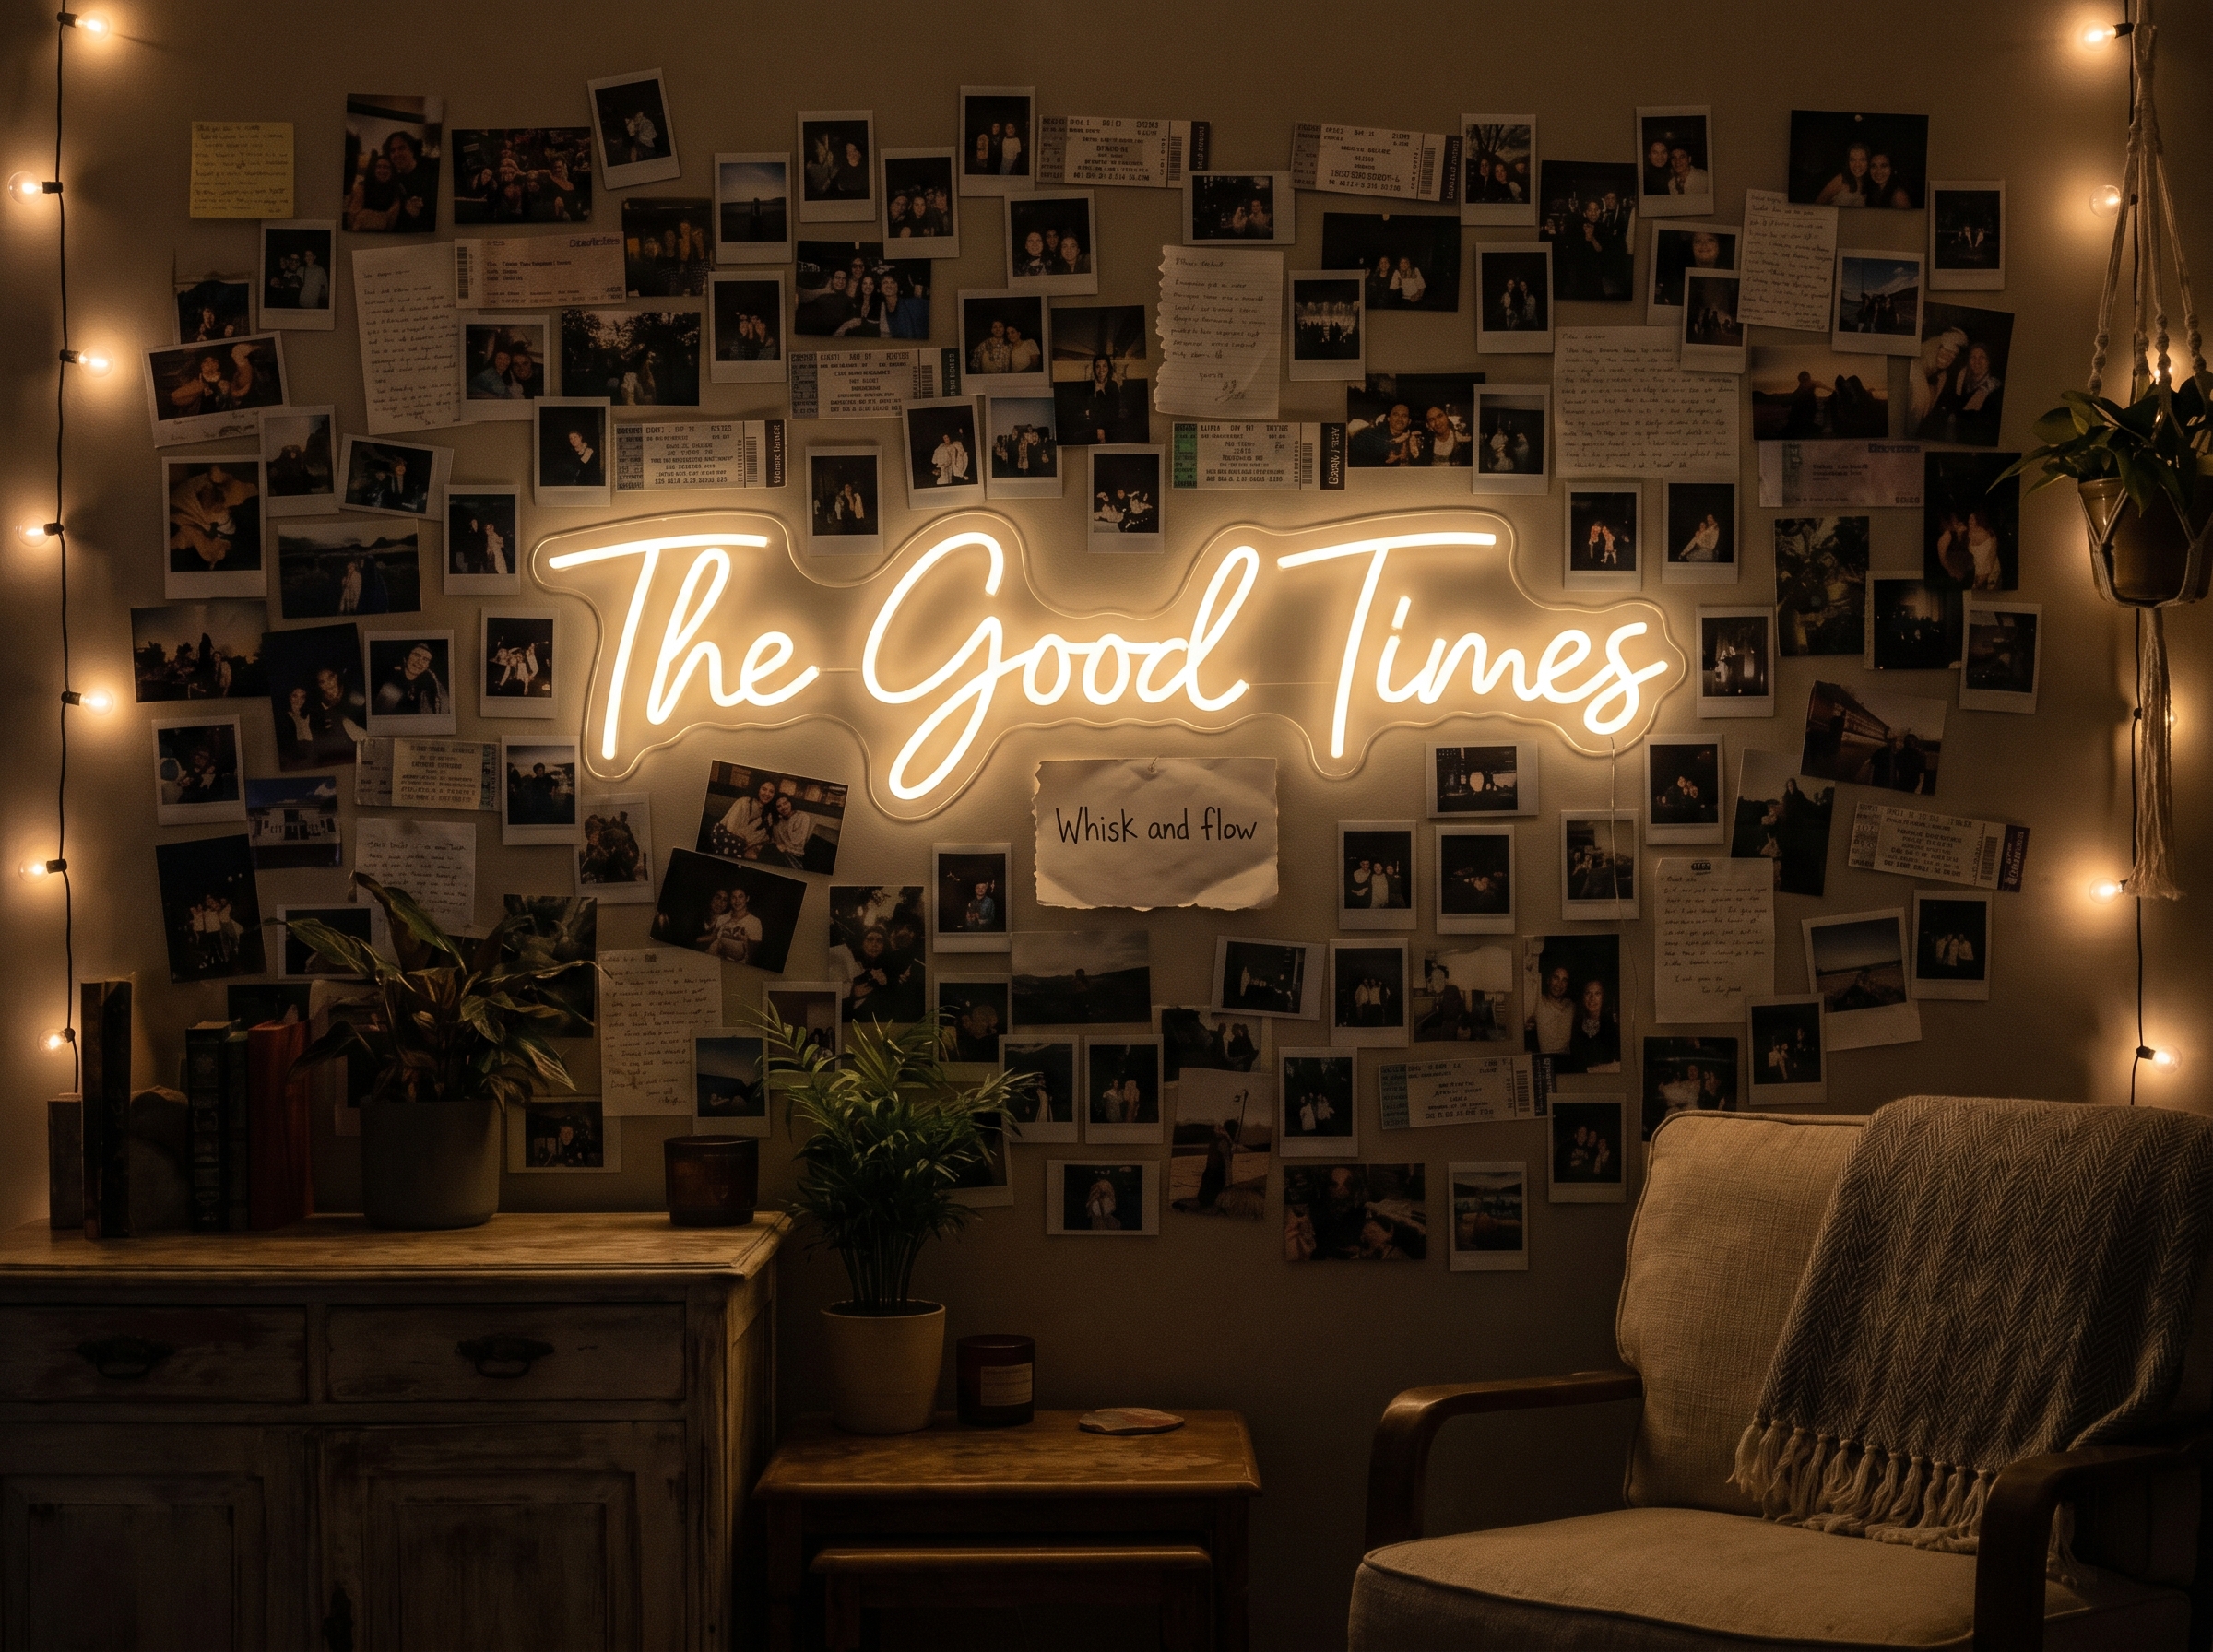
If you want your memory wall to double as a dramatic piece of art that sets the mood for the entire room, combining a dense photo collage with a custom neon sign is the way to go. Start by sourcing a custom LED neon sign—choose a phrase that resonates with you, like “The Best Days,” your family name, or a favorite song lyric. Choose a warm white or soft amber color to maintain that cozy, inviting aesthetic.
Once the sign is mounted, build your interactive wall around it. Print dozens of your favorite photos in a uniform size (like a crisp 4×4 square) and use double-sided tape to attach them to the wall in a tight, edge-to-edge grid, radiating outward from the glowing sign. The light from the neon will cast a beautiful, cinematic glow over your memories. As new memories are made, you can simply tape new photos over the older ones on the outer edges, keeping the collage fresh, vibrant, and constantly evolving.
Idea 14: Seasonal Branch and Twine Suspension
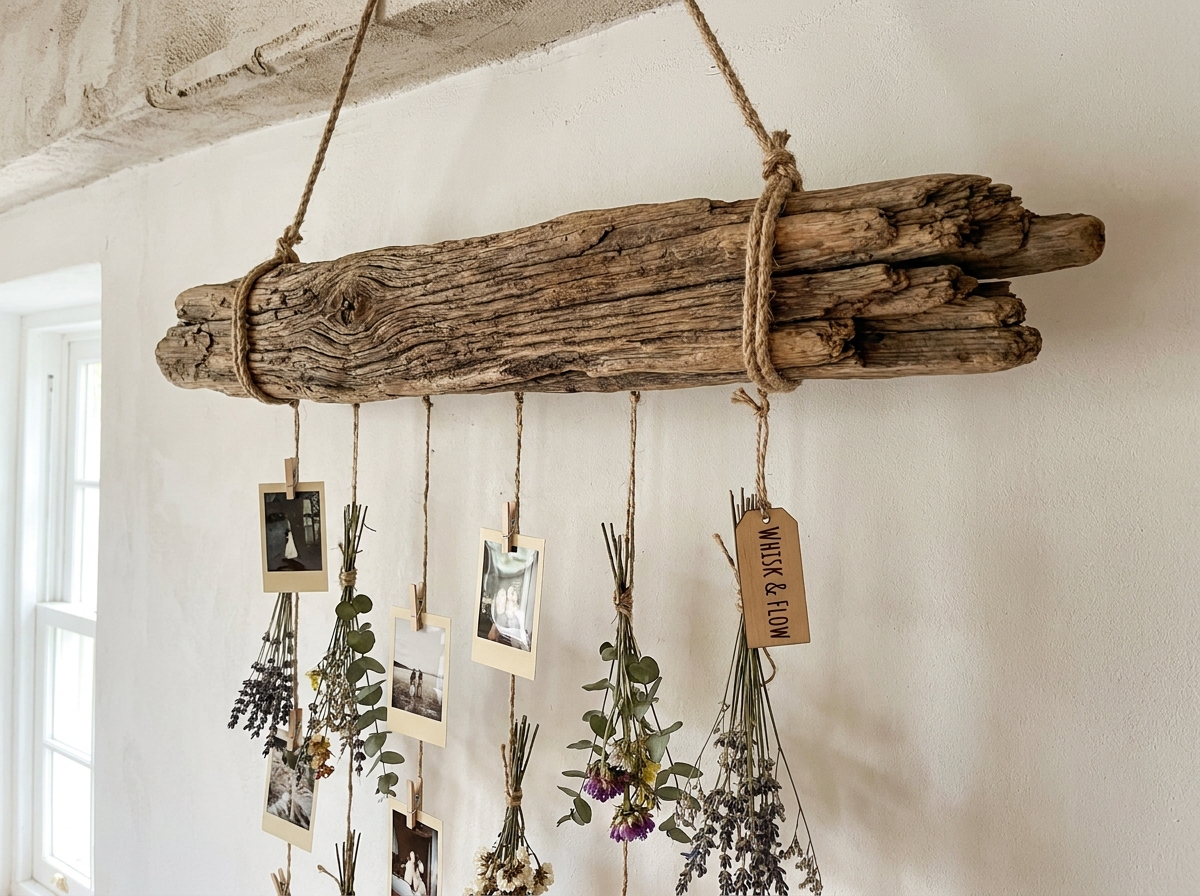
Bring the outdoors inside with a highly organic, bohemian approach to the memory wall. Find a beautiful, sturdy piece of driftwood, a large fallen birch branch, or even a polished wooden dowel. Suspend this branch horizontally from the wall or ceiling using strong leather straps or thick macrame rope.
From this main branch, tie multiple strings of twine or invisible fishing line so they cascade downward against the wall. Using tiny clips, attach your photos to these vertical strings. This creates a mesmerizing, mobile-like effect where the photos gently sway if there is a breeze. The interactivity shines with seasonal shifts: in the autumn, you can weave faux fall leaves through the main branch. During the holidays, drape it in pine garlands and string lights. It turns your memory display into a living, seasonal focal point that connects your personal history with the changing world outside.
Idea 15: The Permanent Guestbook Wall
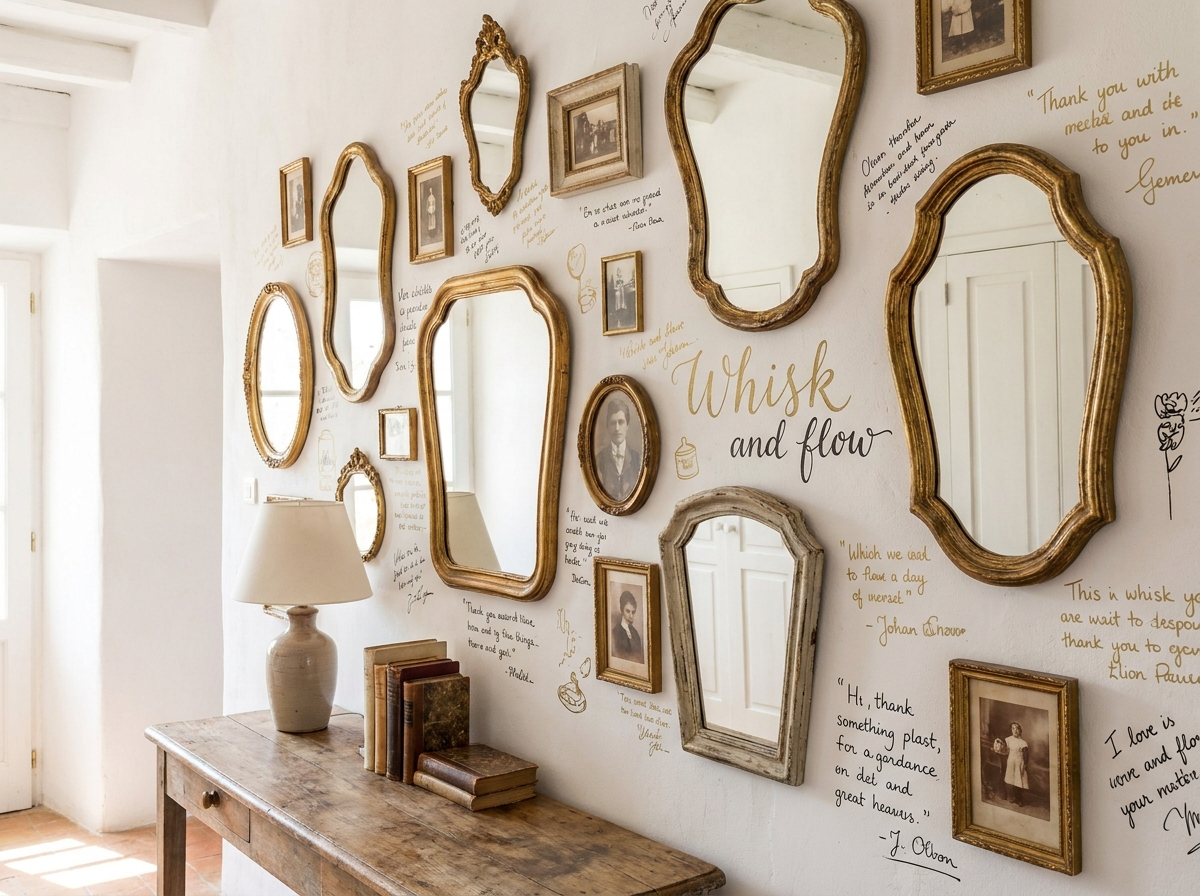
Why confine your guestbook to a dusty book on a coffee table? Turn an entire hallway, or a specific alcove in your home, into a permanent, interactive guestbook wall. Start by hanging a few anchor pieces—a beautiful mirror, a clock, and a few core family photos. Then, leave a cup of high-quality, fine-tip permanent markers (like black, gold, or silver) on a nearby pedestal.
Whenever friends, extended family, or loved ones come to visit, ask them to write a message, sign their name, or draw a tiny doodle directly onto the wall space surrounding your frames. Over the years, this wall will transform into an intricate, deeply emotional tapestry of everyone who has passed through your doors. The photos you hang act as the anchors, while the handwritten notes become the wallpaper. It is the ultimate expression of an interactive home, proving that a house is truly built by the people who share it.
Conclusion
Creating an interactive memory wall is one of the most rewarding home design projects you can undertake. It shifts the focus from simply decorating a room to actually curating a space that reflects your life’s ongoing story. Whether you prefer the sleek, modern look of clear acrylic boards, the cozy bohemian vibe of twine and clothespins, or the dynamic fun of a chalkboard canvas, the key is flexibility. Don’t be afraid to mix and match these ideas—hang a neon sign over a chalkboard, or mix floating shelves with a wire grid.
Your memories are constantly evolving, and your home decor should have the freedom to evolve with them. So grab your favorite photos, pick a blank wall, and start building a display that invites everyone to stop, interact, and remember the good times.